Grow Guides · Preserving the Harvest

How to Dry Herbs at Home

October 15, 2026· 7 min read· 0 comments

Drying is one of the oldest and simplest ways to carry a summer herb harvest into the cooler months, and it needs little more than airflow, shade, and patience. The Harvest Company treats the days after the cut as part of the growing season, because the care you take there decides how much flavor reaches the jar.

Most of good herb drying comes down to three things: picking at the right moment, giving the leaves steady airflow in a shaded spot, and confirming they are fully dry before they go into a jar.

Quick answer
Pick herbs in the morning once the dew has dried, shake off any dirt, and dry them in small bundles or a single layer in a warm, shaded, well-ventilated spot. They are ready when the leaves crumble and the stems snap. Store the dry leaves whole in an airtight jar away from light and heat, and crush them only when you cook.
How to Dry Herbs at Home
Shade keeps the color

Direct sun fades herb leaves and can drive off the aromatic oils you grew them for. A warm, shaded spot with moving air dries them gently and keeps the green color and the flavor.

Dry means crisp, not leathery

A leaf that bends instead of crumbling still holds moisture, and damp herbs sealed in a jar can mold. When in doubt, give the batch another day or two before it goes into storage.

Two ways to dry

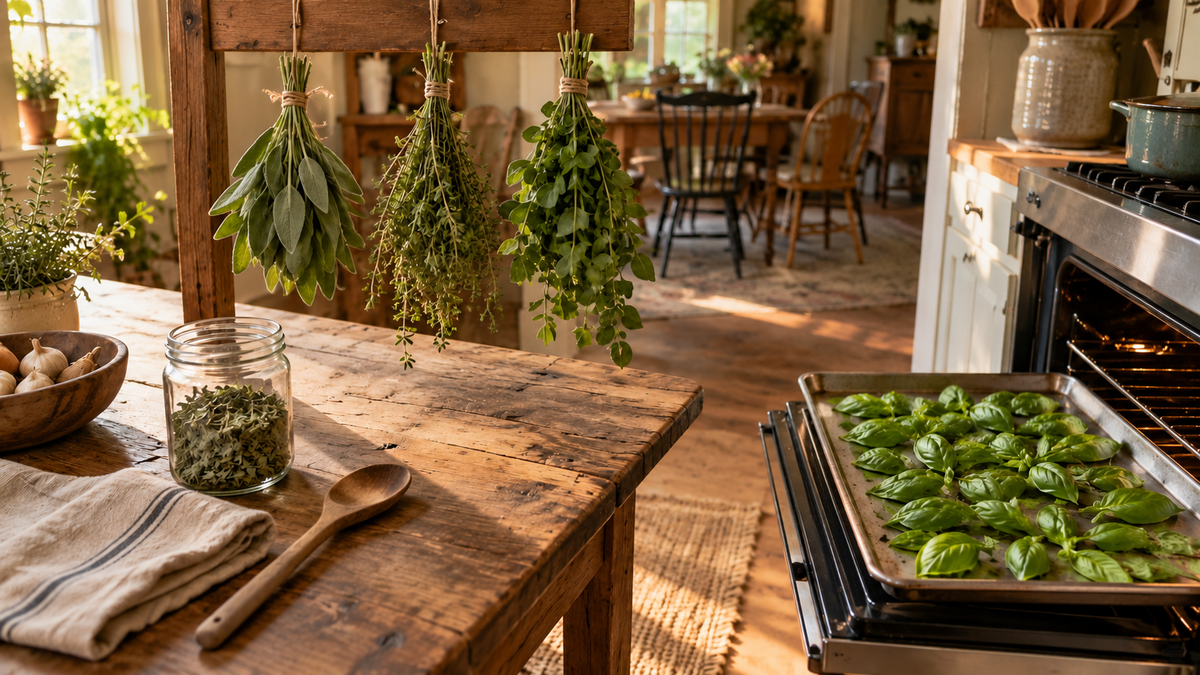
Air dry slowly, or use low heat.

Both methods work for home herbs. Your climate and your schedule usually decide which one fits.
Air drying
Low heat (oven or dehydrator)
Best for
Dry, airy weeks, woody herbs like rosemary, thyme, and oregano, and anyone who prefers a hands-off method.
Humid weeks, tender leafy herbs like basil and mint, and batches you need to finish quickly.
Time
Several days to about two weeks, depending on the herb and the humidity in the room.
Usually a matter of hours, though it needs a check every so often.
Equipment
String or a hanging drying rack, plus a shaded spot with steady airflow.
A dehydrator, or an oven set to its lowest setting with the door left slightly open.
Flavor and color
Gentle drying tends to hold color and aroma well when the leaves stay out of direct sun.
Quick, but too much heat can scorch leaves and dull the flavor, so keep it low.
What to watch
Slow drying in damp air invites mold, so airflow matters more than anything else.
Scorching at the edges, which means the heat is too high or the batch is left too long.
Drying herbs at home

From the garden to the jar.

Six steps, in order. Each one protects the flavor you grew.

Step 01Pick

Harvest in the morning, after the dew dries

Cut stems in the morning once the dew has burned off, when the leaves are dry and the plant is holding its best flavor. Choose healthy, clean growth and leave any yellowed or damaged leaves behind.

Step 02Prep

Clean gently and dry completely

Shake off dirt and insects, and rinse only if the herbs really need it. If you wash them, pat the stems and leaves fully dry first, because surface water slows drying and encourages mold.

Step 03Arrange

Bundle woody herbs, spread tender ones

Tie small bundles of rosemary, thyme, sage, or oregano and hang them upside down. Lay basil, mint, and other tender leaves in a single layer on a net rack so air reaches every surface.

Step 04Place

Choose a warm, shaded, ventilated spot

A closet, a spare room, or a small grow tent with a little airflow works well. Keep herbs out of direct sun and away from steamy rooms like the kitchen during cooking.

Step 05Test

Test for dryness instead of counting days

Drying time changes with the herb, the room, and the weather, so check by touch. The leaves should crumble easily and the stems should snap rather than bend. If anything feels soft, keep drying.

Step 06Store

Jar the leaves whole and label them

Strip the dry leaves from the stems and store them whole in an airtight jar, away from light and heat. Crush them at the moment you cook, and add the herb and the date to a label.

Why dried herbs fall short

Three habits behind flat or moldy herbs.

Each one is a small change in timing or placement, not new gear.

Common beginner mistakes
No.
Mistake
What goes wrong
The fix
Severity
01
Jarring herbs before they are fully dry
✕Sealing leaves that still hold a little moisture, which can build condensation in the jar and let mold start within days.
✓Wait until leaves crumble and stems snap, and check the jar for fog on the glass over the first few days.
Most common
02
Drying in direct sun or a damp room
✕Setting herbs on a sunny sill or in a steamy kitchen, where sun fades the leaves and humidity slows the drying.
✓Choose a shaded, warm, ventilated spot, and use a low-heat method when the week is humid.
Common
03
Crushing the leaves too early
✕Rubbing the leaves into flakes before storage, which releases the aromatic oils and leaves less flavor for the pot.
✓Store the leaves whole and crush them just before cooking.
Underrated
Key takeaways

Five things to remember.

  1. 01Pick in the morning after the dew has dried, and choose clean, healthy stems.
  2. 02Give herbs steady airflow in a warm, shaded spot, since sun fades them and damp air invites mold.
  3. 03Hang woody herbs in bundles and spread tender leaves in a single layer for even drying.
  4. 04Test by touch, not by calendar: leaves should crumble and stems should snap before storage.
  5. 05Store leaves whole in an airtight jar away from light and heat, and crush them only when you cook.
Discussion

Questions or notes? Drop them here.

A real grower replies within a business day.

No comments yet. Be the first.

FAQ

Common questions about drying herbs.

Touch is the best test. Dry leaves crumble easily between your fingers and the stems snap instead of bending. If any leaf feels soft or leathery, give the batch more time before jarring it.
Only if they need it. Shaking off dirt is often enough. If you do rinse, pat the herbs completely dry first, since surface water slows drying and can encourage mold.
It is better not to. Direct sun can fade the leaves and drive off the aromatic oils. A warm, shaded spot with moving air gives better color and flavor.
It varies. Air drying often takes several days to about two weeks depending on the herb and the humidity, while a dehydrator or low oven can finish in hours. Test by touch rather than counting days.
Keep the leaves whole in an airtight jar, away from light and heat, and label each jar with the herb and the date. Crush a pinch only when you are ready to cook with it.
The promise

Grow better. Eat better. Every day.

Your partner in every harvest. Dry the herbs you grew, and the flavor stays on your shelf long after the season.

Posted October 15, 2026 · Updated October 15, 2026 · 7 min read